-
ConnectClick Team
- 17 June 2024
- 4 min read
Applying wallpaper on a chimney breast – a how-to guide

Table of contents
How to choose wallpaper to cover the chimney breast?
Selecting the perfect chimney breast wallpaper for your chimney breast is key to creating a standout feature in your living space. Start by considering the room’s overall style and color scheme. Opt for a wallpaper design that complements the existing decor while adding a unique touch to the chimney breast. Textured wallpapers can add depth and intrigue, whereas metallic or gloss finishes reflect light beautifully, enhancing the ambiance of the room. It’s essential to choose a wallpaper that is heat resistant and durable to withstand the heat output from the fireplace. Measure the area carefully to ensure you purchase the right amount of wallpaper, including extra for pattern matching. Check the product specifications for fire safety ratings and adherence requirements. For a seamless look, consider coordinating your wallpaper choice with other elements in the room, such as curtains or upholstery. Visit showrooms or request samples to see how different textures and colors work in your space before making a final decision. This approach will help you achieve a harmonious yet striking effect, transforming your chimney breast into a captivating focal point.
Applying a chimney breasy – step by step
Wallpapering chimney breast is an excellent way to enhance the aesthetic appeal of any living space. This task requires careful planning and precision to achieve a flawless finish. By following a systematic approach, you can ensure the wallpaper not only looks great but also adheres properly in the face of the heat emitted by the fireplace. Below are the detailed steps to guide you through the process.
Step 1 – Preparation
Begin the process by carefully measuring the chimney breast to accurately estimate the amount of wallpaper required. It is crucial to prepare the surface by ensuring it is clean, dry, and smooth. Any existing wallpaper should be stripped off, and any cracks or imperfections in the wall should be repaired to provide a smooth canvas for the new wallpaper.
Step 2 – Choosing wallpaper
Selecting the right wallpaper for chimney breast is vital for both aesthetics and functionality. Opt for durable, heat-resistant wallpaper that can withstand the heat from the fireplace. Consider the room’s existing decor when choosing the wallpaper design and texture. Textured or metallic wallpapers can add a dynamic visual appeal and enhance the overall ambiance of the room.
Step 3 – Cutting the wallpaper
Measure and cut the wallpaper strips to the required size, accounting for extra length to align the patterns. Lay the strips out on the floor to visualize the final arrangement and ensure correct pattern sequencing. This preparation step helps minimize errors and waste during the application.
Step 4 – Applying adhesive
Apply a uniform layer of wallpaper adhesive. Depending on the type of wallpaper, you may need to apply the adhesive to the wall or directly onto the back of the wallpaper. Ensure the adhesive is spread evenly to avoid bumps and lumps that could mar the surface’s appearance.
Step 5 – Hanging the wallpaper
Start hanging the wallpaper from the center of the chimney breast, carefully aligning the first strip to ensure it is perfectly vertical. Smooth the wallpaper from the center outwards to remove any air bubbles. This method helps maintain a symmetrical and professional-looking finish.
Step 6 – Seaming and trimming
Align the edges of the next strips closely with the first, paying attention to the wallpaper pattern to ensure a seamless match. Use a sharp blade to trim any excess wallpaper at the top and bottom of the chimney breast. Proper trimming contributes to a clean and tidy appearance.
Step 7 – Drying and finishing
Allow the wallpaper to dry completely. Avoid using the fireplace during this time to prevent excessive heat from affecting the adhesive’s drying process. Once dry, inspect the wallpaper for fireplace wall for any air bubbles or sections that might not be fully adhered and smooth them out or reapply adhesive as necessary.
What to watch out for when applying wallpaper on a chimney breast?
When wallpapering a chimney breast, ensure the surface is devoid of moisture and heat while applying. Choose heat-resistant wallpaper to avoid peeling or discoloration from the fireplace’s warmth. Verify wall smoothness and fix any imperfections for even application. Accurately match wallpaper patterns at seams for a seamless look. Finally, allow sufficient drying time before using the fireplace to prevent adhesive from weakening.
You might be interested in...
- Building advice
17 September 2024
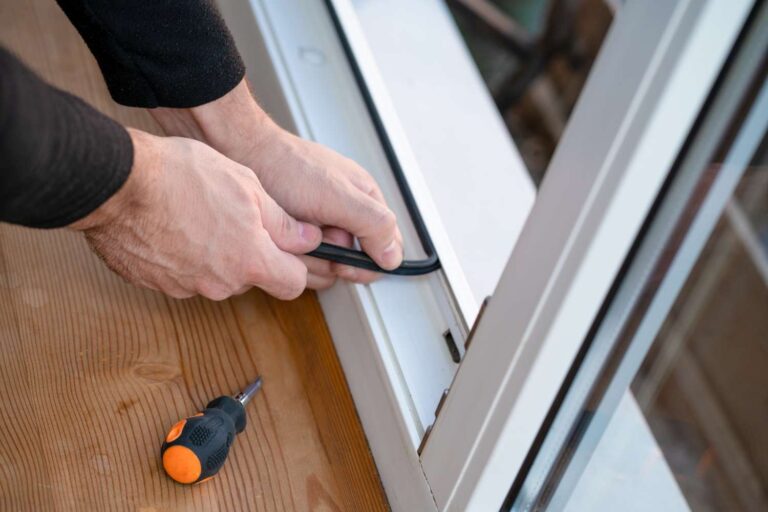
Window seal repair by yourself – DIY guide
To repair window seal by yourself is a practical and cost-effective DIY project. This guide will help you understand the basics of identifying seal damage and choosing the right materials for the repair. With a few tools and some patience, you can restore your window’s insulation and functionality, enhancing your home’s comfort and energy efficiency. Follow these steps to ensure a successful repair and maintain the integrity of your windows.
- Building advice
17 September 2024
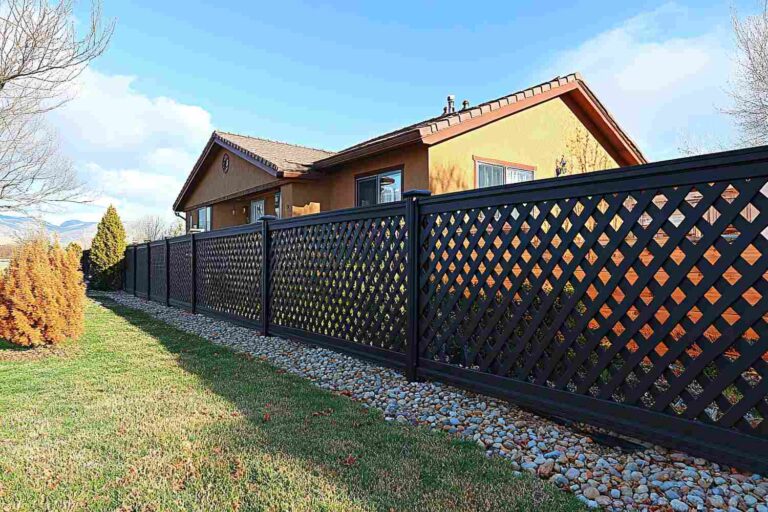
Optimal fencing options for gardens in windy areas
When considering garden fencing options for windy areas, opt for durable materials like vinyl or treated metal, which resist wind damage and require little maintenance. Designs with gaps, such as lattice or horizontal slats, allow wind to pass through, reducing pressure and damage. Ensure the fence posts are securely anchored deep with concrete for stability. Adding vegetation like tall shrubs and trees near the fence can also act as natural windbreaks, enhancing protection and aesthetics as one of the maintenance tips for windy gardens.
- DIY
- Plumbing advice
17 June 2024
A leaking toilet – how to fix it?
Dealing with a leaking toilet can be frustrating, but it’s a relatively common problem that many homeowners face at some point. Fortunately, fixing a leaky toilet is often a straightforward DIY task that doesn’t require extensive plumbing knowledge. Whether the leak is at the base, from the water supply line, or between the tank and the bowl, addressing it promptly can prevent water wastage and save you from higher utility bills. In this guide, we will walk you through the steps to diagnose and fix the most common types of toilet leaks, helping you get your bathroom back in order quickly and efficiently.