- 17 September 2024
- 4 min read
How to create the perfect driveway?

Table of contents
Why is a well-designed driveway so important?
A well-designed driveway is crucial for several reasons, impacting both functionality and curb appeal. Firstly, it serves as the primary access route to your home, needing to withstand regular vehicle traffic without deteriorating prematurely. A properly constructed driveway prevents issues like potholes and cracks, which are not only unsightly but can also damage vehicles and pose safety hazards.
Planning your perfect driveway
Here’s a structured approach to help you get started:
- Assess your needs – determine the size and capacity of your driveway based on the number of vehicles you own and the available space. Consider future needs as well, such as additional vehicles or heavy traffic.
- Choose the right material – select materials that fit your climate, budget, and the style of your home. Common options include concrete, asphalt, gravel, and pavers. Each has its advantages and disadvantages in terms of cost, durability, maintenance, and appearance.
- Design for functionality – plan the layout of your driveway with ease of access and mobility in mind. Ensure there is enough turning space and consider the slope of the driveway for proper drainage. Avoid steep inclines if possible, to enhance accessibility and safety.
- Incorporate drainage solutions – proper drainage is crucial to prevent water accumulation that can damage the driveway and adjacent structures. Plan for grading, drainage ditches, or installing permeable materials to manage water runoff effectively.
- Consider aesthetics – enhance curb appeal by aligning the driveway’s design with your home’s exterior. Consider adding design elements such as borders, patterns, or colors. Landscaping around the driveway can also improve its appearance and integrate it with your overall property design.
- Secure necessary permits – before construction begins, check local regulations, and secure any necessary permits. Some locales might have specific requirements about the materials and methods used for driveway construction.
- Hire professionals – depending on the complexity and material choice, consider hiring professionals for construction. Experienced contractors can provide valuable insights, ensure quality work, and handle any unexpected issues during the installation.
Aesthetic qualities of the driveway
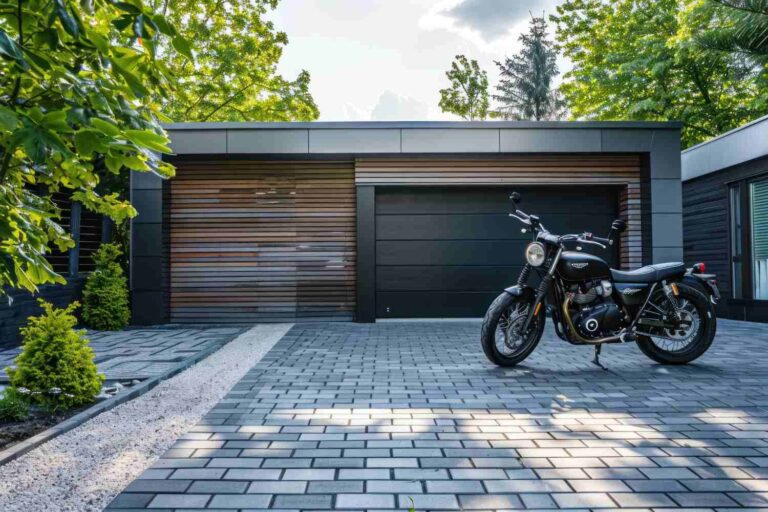
The aesthetics of a driveway enhance a property’s curb appeal. Choices in materials, colors, and layout can complement a home’s exterior, while decorative borders and patterns add unique visual interest.
Choosing the right driveway materials
Choosing the right driveway surfaces materials involves considering factors like durability, maintenance, driveway cost, and aesthetics. Here’s a list of common materials used for driveways:
- Concrete – highly durable and offers a clean, consistent look. It can be stamped or colored for a decorative effect.
- Asphalt – ideal for colder climates due to its flexibility under temperature fluctuations. It requires periodic sealing but provides a smooth, durable surface.
- Gravel – affordable and quick to install, offering good drainage. However, it can shift and may require periodic replenishment.
- Pavers – available in various materials such as concrete, clay, and natural stone. They are highly aesthetic and can be laid in various patterns but are typically more expensive than other options.
- Brick – offers a classic look that can enhance the charm of a home. It’s durable but can be expensive and require more maintenance to maintain its appearance.
- Crushed stone – like gravel but finer and more stable. It provides good drainage and has a more polished look than plain gravel.
- Recycled materials – options like recycled concrete or rubber provide an environmentally friendly choice and can offer unique aesthetics and benefits depending on the material.
Incorporating drainage solutions
Incorporating effective drainage in your driveway design is crucial. Use a slight slope to direct water runoff, install channels or grates for better water management, and consider permeable paving materials to allow water to seep through.
Safe and functional driveway
A safe and functional driveway features a gentle slope for easy navigation, ample lighting for visibility, and a smooth surface free from obstructions. Proper width and turning areas ensure ease of use.
The perfect driveway – commission a specialist or do it yourself?
For the perfect driveway, hiring a professional is highly recommended. Specialists bring expertise in design and construction, ensuring the driveway is built to last, meets all safety standards, and aligns aesthetically with your home. They can handle technical challenges like grading and drainage effectively, and their experience with materials can guide you to the best choices for your climate and usage needs. While DIY can be tempting for cost savings, the long-term benefits of professional installation—durability, functionality, and enhanced curb appeal—make it a worthwhile investment.
You might be interested in...
- Building advice

24 September 2024
Build a new house – how much money do you need?
To build a new house is a major investment, with costs varying depending on location, size, materials, and design. How much it is to build a new house, like really? In the UK, the average cost ranges from £1,800 to £3,000 per square metre, meaning a 3-bedroom house could cost between £180,000 and £300,000. Additional expenses include planning permissions, architect fees, and finishing touches like landscaping. This guide explores the factors that affect the total cost, helping you estimate how much money you’ll need for a new build.
- Building advice
- DIY

17 September 2024
Mounting your TV on the wall – all what you need to know!
Mounting your TV on the wall offers a sleek, space-saving solution, but it requires proper planning and execution. From selecting the right mount type and ensuring VESA compatibility to finding the perfect spot and safely installing the bracket, each step is crucial. This guide covers everything you need to know, including tools, installation steps, cable management, and troubleshooting tips, ensuring a secure, stylish setup for your home.
- Building advice
- Renovation advice

17 September 2024
The cost of a new kitchen – what expenses do you have to take into account?
When planning for a new kitchen, several key expenses need consideration. These include cabinetry, appliances, countertops, flooring, and installation. Additionally, you should factor in costs for lighting, plumbing, and finishing touches. Each of these components varies widely in price based on quality, materials, and customization. It’s important to get detailed quotes and plan for contingencies to ensure your budget covers all aspects of the renovation.